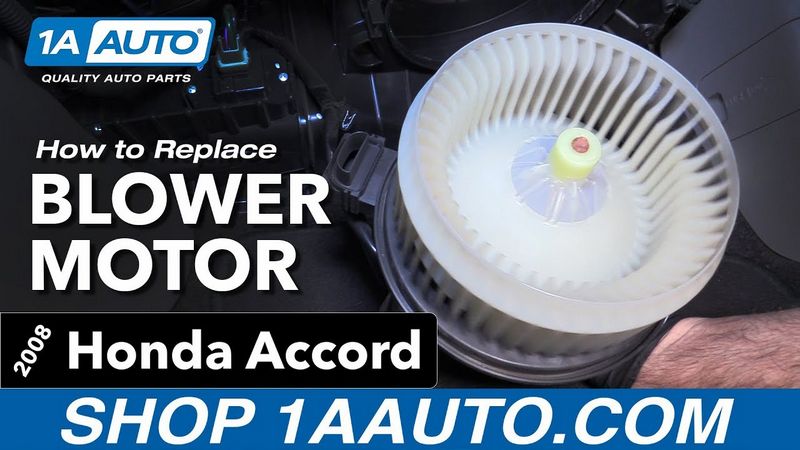
How do you reset a blower motor?
Have you ever experienced a situation where your blower motor suddenly stopped working? It can be frustrating and inconvenient, especially during extreme weather conditions. However, before calling a professional technician and spending a significant amount of money on repairs, it’s worth trying a few simple steps to reset the blower motor on your own.
If you’re wondering how to reset a blower motor, you’re in the right place. In this step-by-step guide, we will walk you through the process, providing easy and quick methods to get your blower motor up and running again.
Firstly, it’s important to understand what a blower motor is. It is a crucial component of an HVAC system that helps circulate heated or cooled air throughout your home. When the blower motor stops working, it disrupts the airflow and can lead to various issues. By following the steps outlined in this guide, you can reset the blower motor and restore its functionality.
The Importance of Blower Motor Maintenance
Keeping your blower motor maintained is crucial to ensure its optimal performance and longevity. As a homeowner, it is essential to understand the importance of regular maintenance to avoid costly repairs or replacements.
A blower motor plays a vital role in circulating air throughout your home’s HVAC system. It is responsible for providing your living space with warm or cool air, depending on the season. Without a well-functioning blower motor, your comfort and indoor air quality would be compromised.
Regular maintenance of your blower motor can prevent potential issues from arising. By performing simple tasks such as cleaning the motor and its components, you can remove any dirt, debris, or dust that may accumulate over time. This buildup can hinder the motor’s performance and cause it to work harder, potentially leading to overheating or a breakdown.
In addition to cleaning, it is essential to inspect the blower motor for any signs of wear or damage. This includes checking the motor’s belt, fan blades, and electrical connections. By identifying and addressing any issues early on, you can prevent further damage and extend the lifespan of your blower motor.
Regular maintenance also allows you to check the blower motor’s performance and efficiency. Over time, motors can become less efficient due to various factors such as age, wear, or lack of lubrication. By monitoring the motor’s performance, you can ensure it is operating at its maximum efficiency, saving you energy and lowering your utility bills.
While there are professional blower motor maintenance services available, there are simple tasks you can do yourself to keep your motor in top shape. Regularly checking and cleaning the blower motor is a do-it-yourself task that can be done without much hassle. By resetting the motor and performing routine maintenance, you can ensure it continues to operate smoothly and efficiently.
In conclusion, blower motor maintenance is essential for optimal performance, energy efficiency, and longevity. By taking the time to maintain your blower motor regularly, you can avoid costly repairs, extend its lifespan, and enjoy a comfortable living space with clean and well-circulated air.
Signs Your Blower Motor Needs Resetting
If you notice that your blower motor is not functioning properly, it may be time to reset it. There are a few key signs that indicate your blower motor needs resetting:
1. No air blowing: If you turn on your blower and there is no air coming out of the vents, this is a clear sign that something is wrong. It could be a problem with the blower motor and resetting it might fix the issue.
2. Weak airflow: If you feel that the air coming out of the vents is weak or not as strong as it used to be, it could be a sign of a blower motor problem. Resetting the blower motor might help restore proper airflow.
3. Strange noises: If you hear unusual noises coming from your blower motor, such as rattling, squeaking, or grinding, it is a sign that something is not right. Resetting the blower motor can help eliminate these noises.
4. Motor overheating: If you notice that your blower motor is overheating, it could be a result of a malfunction. Resetting the blower motor can address this issue and prevent further damage.
5. Blower running constantly: If your blower motor is running continuously without turning off, it might be a sign that a reset is needed. Resetting the blower motor can help bring it back to normal operation.
Knowing the signs can help you determine when to reset your blower motor and avoid further complications. Keep in mind that if resetting the blower motor does not solve the problem, it may require professional attention.
Safety Precautions Before Resetting
Before you attempt to reset a blower motor, it is important to follow these safety precautions:
1. Turn off the Power: Before performing any work on the blower motor, make sure to turn off the power supply. Locate the circuit breaker or fuse that controls the motor and switch it off to avoid any risk of electrical shock.
2. Wear Protective Gear: When working with a blower motor, it is essential to protect yourself from any potential hazards. Wear safety glasses to shield your eyes from debris, gloves to protect your hands, and a mask to prevent inhalation of dust or other particles.
3. Disconnect the Motor: Prior to resetting the blower motor, you must disconnect it from its power source. As the motor may still have residual power, take caution by wearing insulated gloves and using insulated tools to disconnect any wires or connectors.
4. Inspect for Damage or Obstructions: Before attempting a reset, visually inspect the blower motor for any signs of damage or obstructions. If you notice any broken parts or debris that may be interfering with its operation, address these issues before proceeding with the reset.
5. Refer to the Manufacturer’s Instructions: It is always recommended to consult the manufacturer’s instructions or guide when resetting a blower motor. This will provide you with the specific steps and precautions that may be required for your particular model.
By following these safety precautions, you can ensure a safe and successful reset of your blower motor.
Tools You Will Need
When it comes to resetting a blower motor, you don’t need many tools. In fact, there’s only one tool you’ll need for this task:
| A small screwdriver | To access the reset button on the blower motor |
With just a small screwdriver, you’ll have everything you need to reset your blower motor. Keep in mind that different blower motors may have different reset button locations, so consult your user manual if you’re not sure where to find it.
Now that you know what tools you need, let’s move on to learning how to reset the blower motor.
Step 1: Turn Off the Power
Before you begin the process of resetting a blower motor, it is important to ensure your safety by turning off the power. This step is crucial to prevent any accidents or injuries during the reset process. Here’s how you can do it:
|
Step |
Instructions |
|
1 |
Locate the main power switch or circuit breaker for your blower motor. |
|
2 |
Turn off the main power switch or flip the circuit breaker to the “off” position. |
|
3 |
Ensure the power is completely turned off by testing the blower motor’s operation. |
By following these simple steps, you can easily turn off the power and prepare to reset your blower motor without any risks. Always remember to put safety first and proceed with caution throughout the process.
Step 2: Access the Blower Motor
To begin the process of resetting a blower motor, you will need to access the motor itself. Follow these steps to gain access to the blower motor:
|
|
Once you have accessed the blower motor, you can proceed to the next step of the reset process.
Step 3: Disconnect the Wiring
Once you have located the blower motor, it is time to disconnect the wiring. This step is crucial in order to safely reset the motor. To disconnect the wiring, you will need a pair of wire cutters or pliers.
Start by identifying the wires that are connected to the motor. There are usually two or three wires, depending on the model. Carefully inspect each wire to determine which ones need to be disconnected.
Using the wire cutters or pliers, gently remove the connectors or clips that are holding the wires in place. Be sure to handle the wires with care to avoid any damage. If necessary, use the wire cutters to cut through any zip ties or tape that may be securing the wires.
Once the wires are free, pull them away from the motor to create some slack. This will allow you to easily access the motor and perform the reset. Make sure to remember the position of each wire so that you can reconnect them correctly later.
Important: Before proceeding to the next step, ensure that the blower motor is completely disconnected from any power source to avoid any electrical accidents.
By following these steps and disconnecting the wiring, you are now ready to move on to the next stage of resetting the blower motor.
Step 4: Remove the Blower Motor
After successfully completing the reset process, you can now proceed to remove the blower motor. This step involves a few simple actions that will allow you to safely disconnect and take out the blower motor from its housing.
To start, locate the blower motor within your vehicle’s HVAC system. It is typically found behind the glove box or underneath the dashboard. You may consult your vehicle’s manual for specific instructions on locating the blower motor.
Once you have located the blower motor, you will need to disconnect the wiring harness that is connected to it. Carefully unplug the harness by pulling it away from the blower motor. Take note of how the harness is connected before removing it to ensure easy reinstallation later.
Next, locate and remove the mounting screws or bolts that secure the blower motor to its housing. These screws or bolts may be located on the sides or bottom of the blower motor. Use the appropriate tools, such as a screwdriver or socket wrench, to remove them.
After removing the mounting screws or bolts, gently pull the blower motor out of its housing. Be careful not to damage any surrounding components or wiring. If the blower motor seems stuck, you can gently wiggle it while pulling to loosen it from its housing.
Once the blower motor is free from its housing, inspect it for any signs of damage or wear. If you notice any issues, such as a worn-out fan or a burnt-out motor, you may need to replace the blower motor entirely.
Remember to keep the blower motor in a safe place during the inspection and any necessary repairs or replacement. Once you have completed the necessary steps, you can proceed to reinstall the blower motor following the reverse order of removal.
Important: If you are not comfortable performing any of the steps mentioned above, it is recommended to seek professional assistance. Working with the blower motor and HVAC system can be complex, and improper handling may result in further damage or injury.
By following these simple steps, you can easily remove the blower motor and proceed with any necessary repairs or replacements. Keep in mind that regular maintenance and care can help prolong the lifespan of your blower motor.
Step 5: Inspect for Damage
After resetting your blower motor, it’s important to inspect it for any signs of damage. Here’s how you can do it:
- Start by visually inspecting the blower for any noticeable issues such as cracks, dents, or loose connections. Check both the blower housing and the fan blades.
- Next, use a multimeter to test the motor’s continuity. This will help you determine if there are any electrical faults present.
- If you find any damaged or faulty components, it’s important to replace them as soon as possible to avoid further problems.
- Additionally, check the blower motor’s capacitor, as a faulty capacitor can cause the motor to malfunction. Test it using a capacitor tester if possible.
- Finally, make sure the blower motor is clean and free of debris. A buildup of dust and dirt can affect its performance.
By thoroughly inspecting your blower motor for damage, you can ensure that it’s in good working condition and avoid future issues. If you are unsure or uncomfortable performing these tasks yourself, it’s always best to contact a professional for assistance.
Step 6: Reset the Blower Motor
To reset a blower motor, you need to follow these simple steps:
- First, locate the blower motor. It is usually located in the HVAC system, near the air conditioning unit.
- Next, find the reset button on the blower motor. It is typically a small, red button that you can press with your finger.
- Once you have located the reset button, press and hold it for about 10 seconds.
- Release the reset button and wait for a few minutes to allow the blower motor to reset.
- Once the reset process is complete, you can test the blower motor by turning on the HVAC system. The blower motor should start running smoothly.
If the blower motor does not reset or continues to malfunction, you may need to consult a professional HVAC technician to diagnose and repair the issue. They have the necessary tools and expertise to handle complex repairs.
Step 7: Reinstall the Blower Motor
Now that you have successfully reset the blower motor, it’s time to reinstall it. Follow these steps to ensure a proper reinstallation:
1. Disconnect the power:
Before you begin, make sure that the power to your blower motor is disconnected. This will prevent any electrical accidents and keep you safe. Check that the circuit breaker or fuse for the blower motor is turned off.
2. Locate the blower motor:
The blower motor is typically located near the air conditioning unit or furnace. Refer to your owner’s manual or consult a professional if you are unsure of its location.
3. Inspect the blower motor:
Take a moment to inspect the blower motor for any damage or wear. Look for loose wires or connections and clean any accumulated debris or dust.
4. Position the blower motor:
Align the blower motor in its designated spot and make sure it fits securely. Double-check that any screws or mounting brackets are properly aligned.
5. Reconnect the wiring:
Reconnect any electrical wiring that was disconnected during the reset process. Ensure that the connections are tight and secure to prevent any electrical issues.
6. Test the blower motor:
Turn on the power and test the blower motor to ensure it is functioning properly. Listen for any unusual sounds or vibrations and pay attention to the air output.
7. Complete the installation:
If everything is in working order, finish reinstalling the blower motor by securing any remaining screws or brackets. Replace any covers or panels that were removed during the reset process.
Remember, if you are not comfortable performing these steps yourself, it is always best to consult a professional technician who can safely reinstall the blower motor for you.
Step 8: Reconnect the Wiring
Once you have reset the blower motor, it is important to reconnect the wiring properly. Follow these steps to ensure a secure connection:
| 1 | Start by locating the wires coming from the blower motor. |
| 2 | Check the wires for any damage or fraying. If you find any, replace them with new wires. |
| 3 | Make sure the wires are clean and free of any dirt or debris. Clean them if necessary. |
| 4 | Connect the wires back to their original positions. The wire colors should match up for a correct connection. |
| 5 | Use wire connectors or electrical tape to secure the wires together. Make sure the connection is tight and secure. |
| 6 | Double-check all the connections to ensure everything is properly connected and secured. |
By following these steps, you can effectively reconnect the wiring of the blower motor after performing a reset. This will ensure that the motor is functioning correctly and help avoid any further issues. If you are unsure about any step, it may be best to consult a professional for assistance.
Step 9: Test the Blower Motor
Once you have successfully reset the blower motor, it is important to test it to ensure that it is working properly. Here is how you can do it:
| 1. | Turn on the blower motor by setting the HVAC system to the desired speed and temperature. |
| 2. | Listen for any unusual noises coming from the blower motor. If you hear any grinding, squealing, or rattling sounds, it may indicate a problem with the motor that needs further attention. |
| 3. | Feel the air coming out of the vents. The blower motor should be able to produce strong and consistent airflow. If the airflow is weak or inconsistent, there may be an issue with the blower motor. |
| 4. | Check the operation of the blower motor by adjusting the fan speed. It should change smoothly and quickly without any delays or interruptions. |
| 5. | If you notice any problems during the testing process, it is recommended to consult a professional HVAC technician for further inspection and repairs. |
By following these steps, you can effectively test the blower motor and ensure that it is functioning correctly after performing a reset.
Step 10: Restore Power and Check Operation
After completing the previous steps on how to reset a blower motor, it is time to restore power and check if the motor is functioning properly.
- Make sure all the electrical connections are secure and properly attached.
- Turn the power back on by flipping the circuit breaker or reconnecting the power supply.
- Switch on the blower motor and observe its operation.
- Listen for any unusual noises or vibrations that could indicate a problem.
- Ensure that the blower motor is producing sufficient airflow.
If the blower motor is not working as desired, or if it does not turn on at all, try troubleshooting the motor or consulting a professional for further assistance.
Common Mistakes to Avoid
When it comes to resetting a blower motor, there are a few common mistakes that you should avoid. Here is a list of what not to do:
| Mistake | Description |
| Skipping the troubleshooting process | If your blower motor is not working, it is important to diagnose the problem first. Skipping the troubleshooting process and jumping straight to resetting the motor may not solve the underlying issue. |
| Not verifying the power source | Before attempting to reset the motor, make sure that the power source is working correctly. A faulty power source can prevent the motor from resetting properly. |
| Resetting the wrong motor | If you have multiple motors in your HVAC system, make sure you are resetting the correct one. Resetting the wrong motor can cause further damage to the system. |
| Not following the manufacturer’s instructions | Every blower motor may have different reset procedures. It is important to read and follow the manufacturer’s instructions to avoid any unnecessary damage or complications. |
| Not seeking professional help | If you are unsure about how to reset a blower motor, it is always best to seek professional help. They have the knowledge and experience to handle the reset process safely and efficiently. |
By avoiding these common mistakes, you can ensure a successful blower motor reset and prevent any further issues with your HVAC system.
When to Seek Professional Help
If you are unable to reset the blower motor using the quick and easy methods mentioned above, or if you are unsure about how to properly reset the motor, it is recommended to seek professional help. While resetting a blower motor might seem like a simple task, it can be more complex than it initially appears.
A professional HVAC technician has the expertise and knowledge to diagnose and troubleshoot problems with the blower motor. They will have the necessary tools and equipment to accurately reset the motor and ensure it is functioning optimally.
Attempting to reset the blower motor without proper knowledge or experience can potentially cause further damage to the motor or other components of your HVAC system. It is also important to note that tampering with the motor without proper training can void any warranties or coverage you may have.
By relying on a professional, you can have peace of mind knowing that the reset process will be done correctly, avoiding any unnecessary expenses or complications down the line. A trained technician can also provide advice on how to properly maintain and care for your blower motor to prevent future issues.
Remember, when it comes to complex tasks like resetting a blower motor, it is always best to reach out to a professional HVAC technician for assistance.
Q&A:
My blower motor isn’t working, what should I do?
If your blower motor isn’t working, the first thing you should do is check the fuse related to the motor. If the fuse is blown, replace it. If the fuse is fine, you can try resetting the blower motor by disconnecting the battery for a few minutes and then reconnecting it. If this doesn’t solve the issue, it might be a problem with the blower motor itself and you may need to consult a professional.
How can I reset my blower motor?
To reset your blower motor, you can start by disconnecting the battery for a few minutes and then reconnecting it. This can help to reset the motor’s control module and resolve any issues that may be causing it to malfunction. If this doesn’t work, you may need to consult a professional for further assistance or troubleshooting.
Is it possible to reset a blower motor on my own?
Yes, it is possible to reset a blower motor on your own. In most cases, you can do this by disconnecting the battery for a few minutes and then reconnecting it. This can help to reset the motor’s control module and resolve any issues. However, if the problem persists, it may be best to consult a professional for further assistance.
What else can cause a blower motor to stop working?
Aside from a blown fuse, there are several other factors that can cause a blower motor to stop working. It could be a faulty blower resistor, a malfunctioning blower switch, or a problem with the blower motor itself. Additionally, electrical issues or wiring problems can also cause the blower motor to malfunction. If you’ve checked the fuse and it’s not the issue, it may be best to consult a professional to diagnose and fix the problem.
Are there any quick fixes to try before resetting the blower motor?
Yes, there are a few quick fixes you can try before resetting the blower motor. First, check the fuse related to the motor and replace it if necessary. Next, make sure that the blower switch is set to the appropriate settings and that the blower resistor is working properly. If these steps don’t solve the issue, you can then try resetting the blower motor by disconnecting the battery for a few minutes and then reconnecting it.


