A Comprehensive Guide to Troubleshooting Common HVAC Issues: Step by Step Solutions for Your System
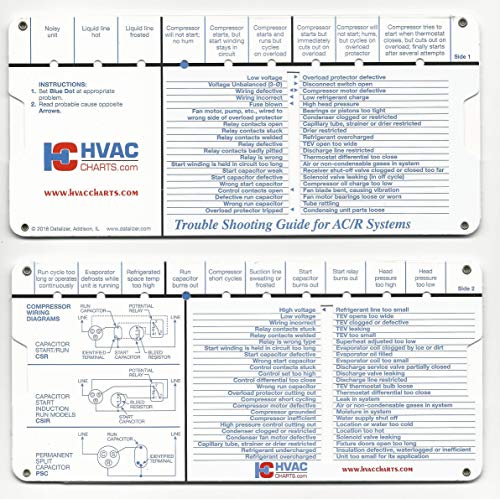
When it comes to the comfort of your home or office, a functioning HVAC system is essential. However, like any mechanical system, HVAC units can experience issues from time to time. These issues can range from minor annoyances to major problems, and understanding how to troubleshoot your HVAC system can save you time and money.
One of the most common HVAC issues is poor air flow. This can be caused by a variety of factors, including clogged air filters, blocked vents, or a malfunctioning blower motor. By regularly changing your air filters and ensuring that your vents are clear of obstructions, you can often improve air flow and restore comfort to your space.
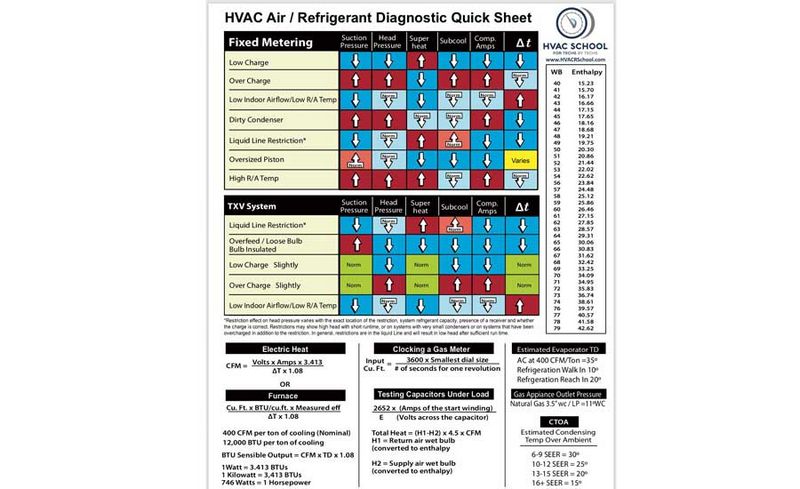
Another common issue with HVAC systems is a lack of cooling or heating. This can be frustrating, especially in extreme temperatures. Troubleshooting this problem involves checking the thermostat settings, ensuring that the unit is receiving power, and inspecting the condenser or heat exchanger. In some cases, a simple adjustment or repair may be all that is needed to restore proper function.
Leaks and strange noises are also common issues that can arise with HVAC systems. Leaks can indicate a refrigerant leak or a problem with the condensate drain, while strange noises can be a sign of loose or worn parts. Identifying and addressing these issues promptly can prevent further damage and help maintain the efficiency of your system.
In this step by step guide, we will provide troubleshooting solutions for these and other common HVAC issues. By following these steps and conducting regular maintenance, you can keep your HVAC system running smoothly and enjoy a comfortable indoor environment year-round.
HVAC System Not Turning On
One of the most common issues with an HVAC system is when it fails to turn on. This can be frustrating, especially during extreme weather conditions. However, there are a few steps you can take to troubleshoot the problem before calling a professional.
1. Check the power supply: Ensure that the HVAC system is plugged in and that the circuit breaker is not tripped. Reset the breaker if necessary or replace any blown fuses.
2. Examine the thermostat: Make sure the thermostat is set to the appropriate temperature and mode. If the thermostat has batteries, check if they need to be replaced.
3. Inspect the air filter: A clogged or dirty air filter can cause the HVAC system to shut down. Remove the filter and replace it if necessary. Regularly cleaning or replacing the air filter can help prevent future issues.
4. Check the condensate drain: If the condensate drain is clogged, it can cause the HVAC system to shut off. Inspect the drain for any blockages and clear them if present.
5. Inspect the safety switch: Some HVAC systems have a safety switch that shuts off the system if there is an issue. Ensure that the switch is in the correct position and functioning properly.
6. Test the power supply: Use a multimeter to check if there is power running to the HVAC system. If there is no power, it may indicate a problem with the electrical wiring or a faulty component. In this case, it is recommended to contact a professional HVAC technician.
By following these troubleshooting steps, you may be able to identify and resolve the issue preventing your HVAC system from turning on. However, if the problem persists or if you are unsure about performing these steps, it’s best to consult a qualified HVAC technician for further assistance.
No Air Flow from Vents
One common issue that homeowners may experience with their HVAC system is a lack of air flow from the vents. This can be a frustrating problem, especially during hot summer months or cold winter nights. Fortunately, there are some troubleshooting steps you can take to address this issue.
The first step in troubleshooting a lack of air flow from the vents is to check the air filter. A dirty or clogged air filter can restrict airflow and reduce the effectiveness of your HVAC system. Replace the air filter if it is dirty and check it regularly to ensure it remains clean.
If the air filter is clean, the next step is to check the ductwork for any obstructions. Sometimes, objects or debris can block the airflow in the ducts and prevent the conditioned air from reaching the vents. Inspect the ductwork for any visible blockages and remove them if possible.
Another possible cause of no air flow from the vents is a malfunctioning blower motor. If the blower motor is not running, the air will not be pushed through the system and into your home. Check the blower motor for any signs of damage or malfunction. If needed, contact a professional HVAC technician to repair or replace the blower motor.
In some cases, the issue may be with the thermostat settings. Make sure that the thermostat is set to the correct mode (cooling or heating) and that the fan is set to “Auto” or “On” mode. If the fan is set to “Off”, there will be no air flow from the vents. Adjust the thermostat settings as needed and test the system to see if the air flow resumes.
If none of these troubleshooting steps resolve the issue, it is recommended to contact a professional HVAC technician. They will have the expertise and tools necessary to diagnose and repair any more complex issues with your system.
By following these troubleshooting steps, you can address the common issue of no air flow from the vents in your HVAC system. Remember to regularly maintain your system to prevent future problems and ensure optimal performance.
Uneven Temperature Distribution in the House
One common issue that homeowners may encounter with their HVAC systems is an uneven temperature distribution in the house. This can be frustrating and uncomfortable, especially during extreme weather conditions. However, with proper troubleshooting, you can find solutions to address this problem and restore a comfortable environment in your home.
Step 1: Check the Air Vents
Start by checking all the air vents throughout your house. Make sure they are fully open and not blocked by any furniture, rugs, or other obstructions. Restricted airflow due to blocked vents can result in uneven temperatures in different areas of your home.
Step 2: Inspect the Ductwork
Next, carefully inspect the ductwork for any leaks, holes, or loose connections. These issues can lead to air leakage, reducing the efficiency of your HVAC system and causing temperature variations. If you find any problems, you may need to seal or replace the affected sections of the ductwork.
Step 3: Check the Insulation
Inadequate insulation in certain parts of your house can contribute to uneven temperature distribution. Pay close attention to areas such as the attic, walls, and floors. If you find insufficient insulation, adding more insulation can help regulate the temperature and improve your HVAC system’s efficiency.
Step 4: Consider Zoning
If you’re still experiencing temperature imbalances, especially in larger homes, you may want to consider installing a zoning system. Zoning allows you to control different areas or zones of your house independently, ensuring that each space receives the desired temperature. This can help eliminate hot or cold spots and achieve a more even distribution of air throughout your home.
Step 5: Schedule Regular Maintenance
Lastly, to prevent future temperature imbalances, it’s essential to schedule regular maintenance for your HVAC system. Professional HVAC technicians can inspect and clean your system, detect any potential issues, and make necessary adjustments to ensure optimal performance.
By following these troubleshooting steps, you can address the issue of uneven temperature distribution in your home and create a more comfortable living environment. If you’re still unable to resolve the problem, it’s recommended to consult with a professional HVAC technician who can offer further guidance and assistance.
Strange Odors Coming from HVAC
If you notice any strange odors coming from your HVAC system, it is important to address the issue quickly. Strange odors can be a sign of potential problems with your system that need to be resolved in order to maintain a healthy and comfortable indoor environment. This guide will provide you with step-by-step solutions for troubleshooting and resolving the strange odors coming from your HVAC system.
- Step 1: Check for burning smells. If you detect a burning smell, turn off your HVAC system immediately and contact a professional technician. This could be a sign of an electrical issue or a malfunctioning component.
- Step 2: Investigate moldy or musty odors. These odors may indicate the presence of mold or mildew in your HVAC system. Check your air filters and clean or replace them if necessary. If the odor persists, consider contacting a professional to inspect and clean your ductwork.
- Step 3: Address sewer-like smells. If you notice a sewage-like odor coming from your HVAC system, it could indicate a problem with the drainage system. Check the condensate drain pan and clean it if necessary. If the odor persists, it is advisable to contact a professional for further investigation.
- Step 4: Resolve chemical or burning plastic smells. These odors may indicate a problem with the wiring or insulation of your HVAC system. Turn off the system and contact a professional technician to inspect and fix any electrical issues.
- Step 5: Deal with rotten egg or sulfur-like smells. These odors may be caused by a gas leak in your HVAC system. If you suspect a gas leak, evacuate the building immediately and contact your gas utility company or emergency services for assistance.
- Step 6: Prevent odors with regular maintenance. To avoid future strange odors coming from your HVAC system, it is important to schedule regular maintenance and inspections. This will help identify and resolve any potential issues before they become major problems.
By following these troubleshooting steps, you can effectively address and resolve strange odors coming from your HVAC system. Remember, if you are unsure about any step or if the problem persists, it is always best to contact a professional technician for assistance.
High Energy Bills
If you have noticed a sudden increase in your energy bills, it could be a sign that there is an issue with your HVAC system. High energy bills are often a result of inefficient operation or problems within the system.
A guide to troubleshooting high energy bills may include the following steps:
| 1 | Check air filters: Dirty air filters can restrict airflow and make your HVAC system work harder. Replace or clean the filters regularly to improve efficiency. |
| 2 | Inspect ductwork: Leaky or poorly insulated ducts can contribute to energy loss. Seal any leaks and ensure proper insulation to prevent wasted energy. |
| 3 | Calibrate thermostat: A thermostat that is not calibrated correctly can cause your HVAC system to run longer or at the wrong times. Recalibrate or upgrade your thermostat if needed. |
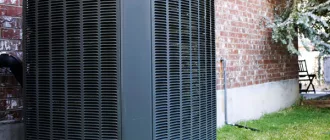
| 4 | Maintain condenser unit: Keep the outdoor condenser unit clean and clear of debris. A dirty condenser can decrease efficiency and lead to higher energy consumption. |
| 5 | Inspect insulation: Poor insulation in your home can result in energy loss. Check insulation in attics, walls, and crawlspaces and add more if needed. |
| 6 | Consider upgrading: If your HVAC system is old or outdated, it may be time to upgrade to a more energy-efficient model. Newer systems often have advanced features that can help reduce energy costs. |
By following these troubleshooting steps and addressing any issues with your HVAC system, you can help lower your energy bills and improve overall efficiency.
HVAC System Cycling On and Off Too Frequently
One common issue that homeowners may encounter with their HVAC system is it cycling on and off too frequently. This can be frustrating and potentially lead to increased energy costs and wear and tear on the system. Fortunately, there are several potential solutions to this problem that can help restore proper functioning to your HVAC system.
The first step in troubleshooting this issue is to check the air filter. A clogged or dirty air filter can restrict airflow and cause the system to cycle on and off more frequently. Make sure to replace or clean the air filter according to the manufacturer’s recommendations to ensure proper airflow and system efficiency.
Another potential cause of frequent cycling is a malfunctioning thermostat. If the thermostat is not working correctly, it may incorrectly sense the temperature and cause the system to cycle on and off frequently. Check the thermostat settings and make sure they are accurate. If necessary, consider replacing the thermostat to ensure proper temperature control.
In some cases, insufficient insulation or leaks in the ductwork can cause the HVAC system to cycle on and off frequently. Check the ductwork for any visible leaks or gaps and seal them using duct tape or mastic sealant. Additionally, consider adding insulation to the ductwork to help maintain a consistent temperature throughout the home.
If none of these solutions resolve the issue, it may be necessary to call a professional HVAC technician to diagnose and repair the problem. They will have the knowledge and tools to identify any underlying issues and provide the appropriate solutions to restore optimal functioning to your HVAC system.
In conclusion, frequent cycling of an HVAC system can be a common issue that homeowners may encounter. By checking the air filter, thermostat, and ductwork, you can often identify and address the issue yourself. If the problem persists, contacting a professional technician is recommended to ensure proper repair and maintenance of your HVAC system.
Noisy HVAC System
One of the common issues with an HVAC system is excessive noise. A noisy HVAC system can be not only annoying but also indicative of underlying problems. Here is a step-by-step troubleshooting guide to help you address the noise issues and restore the tranquility in your home.
Step 1: Identify the Source of the Noise
The first step to troubleshoot a noisy HVAC system is to identify the source of the noise. It could be coming from the indoor unit, outdoor unit, ductwork, or vents. Pay attention to the type and location of the noise.
Step 2: Check the Fan Motor
The fan motor is a common culprit for noise issues in an HVAC system. If the noise is coming from the indoor unit, it could be due to a faulty fan motor. Check for any loose parts or worn-out bearings. Lubricate the bearings if necessary or consider replacing the fan motor.
Step 3: Inspect the Blower Assembly
If you hear a rattling or humming noise, the blower assembly could be the source. Check for any loose parts or debris that could be interfering with the blower’s function. Clean the blower assembly and tighten any loose components. If the issue persists, consider contacting a professional for further inspection.
Step 4: Examine the Compressor
If the noise is coming from the outdoor unit, inspect the compressor. A buzzing or clanging noise could indicate a problem with the compressor. Check for any loose parts, debris, or excessive vibrations. If needed, tighten the components or consider contacting a professional for compressor repair or replacement.
Step 5: Check the Ductwork
Noise issues can also arise from the ductwork. Check for any loose or damaged ducts, especially near the vents. Seal any gaps or leaks using duct tape or professional sealing materials. Insulating the ductwork can also help reduce noise transmission.
Step 6: Regular Maintenance
Perform regular maintenance on your HVAC system to prevent noise issues. Clean or replace air filters, lubricate moving parts, and schedule professional HVAC maintenance to detect and address any potential issues before they escalate.
By following these troubleshooting steps, you can identify and address the noise issues in your HVAC system. However, if you are unsure or unable to resolve the problem yourself, it is always recommended to seek professional assistance to ensure the efficient and quiet operation of your HVAC system.
Poor Indoor Air Quality
Poor indoor air quality can be a common issue with HVAC systems. It can cause discomfort, health problems, and even affect the performance of the system. Here are some steps to troubleshoot and improve indoor air quality:
| 1 | Clean or replace the air filters regularly. Dirty filters can restrict airflow and allow dust and allergens to circulate in the air. |
| 2 | Inspect and clean the air ducts. Dust, pet dander, and other pollutants can accumulate in the ductwork and be circulated throughout the space. |
| 3 | Ensure proper ventilation. Lack of fresh air circulation can result in stale and polluted indoor air. Open windows when possible or consider installing an air exchanger. |
| 4 | Control humidity levels. Excess moisture can promote the growth of mold and mildew, leading to poor air quality. Use dehumidifiers or humidifiers to maintain optimal humidity levels. |
| 5 | Keep the HVAC system clean. Dust and debris can build up on system components, reducing efficiency and affecting air quality. Regularly clean the coils, blower fan, and other components. |
| 6 | Consider installing air purifiers or air cleaners. These devices can help remove pollutants and improve indoor air quality. |
By following these steps, you can identify and address the common issues that contribute to poor indoor air quality in HVAC systems. Improving air quality not only enhances comfort but also promotes a healthier living environment.
HVAC System Blowing Warm Air Instead of Cold
If your HVAC (Heating, Ventilation, and Air Conditioning) system is blowing warm air instead of cold, it can be frustrating, especially during the hot summer months. This is a common issue that many homeowners face, but there are solutions that you can try to troubleshoot the problem.
Step 1: Check the thermostat settings. Make sure that your thermostat is set to “cool” and that the temperature is set to a level that will trigger the AC to kick in. Sometimes, the thermostat might accidentally be set to “heat” or the temperature might be too high, causing warm air to blow.
Step 2: Check the air filter. A dirty or clogged air filter can restrict airflow, causing the system to blow warm air. Check the air filter and replace it if it is dirty. This simple step can often solve the problem.
Step 3: Check the outdoor unit. If the outdoor unit is obstructed or dirty, it can affect the system’s ability to cool the air. Check that there are no leaves, debris, or any obstructions around the outdoor unit. Additionally, you can clean the outdoor unit using a hose to remove any dirt or dust buildup.
Step 4: Inspect the evaporator coils. The evaporator coils are responsible for cooling the air, and if they are dirty or frozen, they can hinder the cooling process. Inspect the evaporator coils for dirt, dust, or ice buildup. If necessary, clean the coils or defrost them to improve their efficiency.
Step 5: Check for refrigerant leaks. Low refrigerant levels can cause the system to blow warm air. If you suspect a refrigerant leak, it is best to call a professional HVAC technician to identify and fix the issue. Refrigerant leaks require specialized tools and expertise to repair.
Step 6: Call a professional. If you have followed the above steps and your HVAC system is still blowing warm air, it is recommended to call a professional HVAC technician. They have the knowledge and experience to diagnose and repair more complex issues that may be causing the problem.
In conclusion, if your HVAC system is blowing warm air instead of cold, it is important to follow a step-by-step troubleshooting guide to identify and resolve the issue. By checking the thermostat settings, air filter, outdoor unit, evaporator coils, and refrigerant levels, you can often solve the problem yourself. However, if the issue persists, it is best to seek professional help to ensure proper repair and optimal cooling performance.
HVAC Compressor Not Working
One common issue that HVAC systems can experience is a malfunctioning compressor. The compressor is a crucial component of the system, responsible for pressurizing the refrigerant to cool the air. If the compressor is not working properly, it can lead to poor cooling performance or even a complete breakdown of the system.
When troubleshooting a HVAC compressor that is not working, it is important to follow a step-by-step guide to identify and resolve the issue. Here are some solutions you can try:
| Problem | Solution |
| The compressor does not turn on | 1. Check the power supply to ensure the compressor is receiving electricity. |
| 2. Check the circuit breaker or fuse connected to the HVAC system and reset or replace if necessary. | |
| 3. Inspect the thermostat settings to ensure the compressor is set to the appropriate temperature. | |
| The compressor turns on but does not cool | 1. Check the air filter and clean or replace if necessary, as a clogged filter can restrict airflow. |
| 2. Inspect the condenser coil and clean it if it is dirty or blocked by debris. | |
| 3. Check the refrigerant levels and add more if necessary, as low levels can prevent proper cooling. |
If following these troubleshooting steps does not resolve the issue with the HVAC compressor, it is recommended to contact a professional technician for further inspection and repair. Attempting to fix complex HVAC issues without proper knowledge or experience may result in further damage to the system.
Remember, regular maintenance and timely repairs can help prevent common HVAC issues like a malfunctioning compressor. It is advisable to schedule routine inspections and tune-ups to keep your system running smoothly and efficiently.
Frozen Air Conditioner
One common issue that homeowners may encounter with their HVAC system is a frozen air conditioner. When your air conditioner freezes up, it can cause your home to become uncomfortable and can even lead to damage to your system if not addressed promptly. Here are some troubleshooting steps and solutions to help you resolve this issue:
Step 1: Check the Air Filter
A dirty or clogged air filter can restrict airflow and cause the evaporator coil to freeze. Check the air filter and replace it if necessary. Regularly changing your air filter is essential for optimal HVAC system performance.
Step 2: Inspect the Evaporator Coil
The evaporator coil is responsible for absorbing heat from the air in your home. If the coil is dirty or blocked, it can cause the refrigerant to freeze as it passes through, resulting in a frozen air conditioner. Clean the evaporator coil carefully using a soft brush or vacuum.
Step 3: Ensure Proper Airflow
Airflow issues can also contribute to a frozen air conditioner. Make sure that all vents and registers are open and unobstructed. Check for any blocked or closed-off air return vents and ensure that furniture or other objects are not blocking the supply vents.
Step 4: Check Refrigerant Levels
A refrigerant leak or low refrigerant levels can cause the evaporator coil to freeze. If you suspect a refrigerant issue, it’s best to contact a professional HVAC technician to inspect and recharge the system if necessary.
Step 5: Schedule Regular Maintenance
Regular maintenance is crucial for keeping your HVAC system running efficiently and preventing common issues like a frozen air conditioner. Consider scheduling annual inspections and tune-ups with a professional HVAC technician to ensure that your system is in good working condition.
By following these troubleshooting steps and solutions, you can address a frozen air conditioner and restore comfort to your home. However, if the problem persists or you are unsure of how to proceed, it’s always a good idea to contact a qualified HVAC professional for assistance.
Leaking HVAC System
A leaking HVAC system is a common issue that homeowners may encounter. It can cause a range of problems and should be addressed promptly to prevent further damage. If you notice water pooling or dripping around your HVAC unit, here are some steps you can take to troubleshoot and solve the issue:
1. Check the condensate drain line: One of the most common causes of a leaking HVAC system is a clogged condensate drain line. This happens when dirt, debris, or algae build up inside the line and prevent the water from draining properly. Use a wet/dry vacuum or a pipe cleaner to remove any obstructions.
2. Inspect the condensate pan: The condensate pan collects the water that drips from the evaporator coil. Over time, the pan can crack or rust, leading to leaks. If you find any damage, replace the pan to prevent further leaking.
3. Check the evaporator coil: A dirty or frozen evaporator coil can cause excessive condensation and lead to leaks. Inspect the coil for dirt, dust, or ice buildup. If necessary, clean the coil with a soft brush or a coil cleaner. If the coil is frozen, turn off the system and allow it to thaw before turning it back on.
4. Ensure proper insulation: In some cases, a leaking HVAC system may be caused by insufficient or damaged insulation around the refrigerant lines. Check the insulation for any signs of wear or damage. Replace it if necessary to prevent condensation and leaks.
5. Check the air filter: A clogged or dirty air filter can restrict airflow and cause the evaporator coil to freeze. In turn, this can lead to leaks. Replace the air filter regularly to maintain proper airflow and prevent freezing.
If these troubleshooting steps don’t resolve the issue, it’s recommended to contact a professional HVAC technician. They will have the knowledge and tools to diagnose and repair any more complex problems with your HVAC system.
Thermostat Not Functioning Properly
One common issue that homeowners may encounter with their HVAC system is a malfunctioning thermostat. The thermostat plays a crucial role in regulating the temperature and overall performance of the system. If your thermostat is not functioning properly, it can lead to discomfort and inefficient heating or cooling.
To troubleshoot this issue, follow these steps:
- Check the power source: Ensure that your thermostat is receiving power. Check if the display is lit up or if there are any error messages indicating a power issue.
- Inspect the thermostat settings: Make sure that the thermostat is set to the desired temperature and mode (heating, cooling, or fan). Verify if the thermostat is on the correct settings for the current season.
- Replace batteries: If your thermostat operates on batteries, they may need to be replaced. Swap out the old batteries with fresh ones and see if this resolves the issue.
- Check the wiring: Turn off the power to your HVAC system and remove the thermostat cover. Inspect the thermostat wiring to ensure that it is properly connected and there are no loose or damaged wires. If any issues are found, consult a professional for assistance.
- Reset the thermostat: Some thermostats have a reset button that you can press to restore it to its default settings. Refer to the manufacturer’s instructions to determine if your thermostat has this feature and how to perform a reset.
- Consider a professional inspection: If none of the above steps resolve the issue, it may be necessary to call a professional HVAC technician to inspect your thermostat and system for any underlying problems.
By following this troubleshooting guide, you can determine the cause of your thermostat malfunction and take the appropriate steps to resolve the issue. Remember that if you are unsure about any step or if the problem persists, it is always best to seek professional assistance to avoid further complications with your HVAC system.
Questions and Answers:
What should I do if my HVAC system is not cooling or heating properly?
If your HVAC system is not cooling or heating properly, there are a few troubleshooting steps you can take. First, check the thermostat to make sure it is set to the desired temperature. Next, check the air filters to see if they are dirty and need to be replaced. You should also check the outdoor unit to see if it is dirty or blocked by debris. If these steps do not solve the issue, it is recommended to contact a professional HVAC technician for further assistance.
How often should I clean or replace the air filters in my HVAC system?
The frequency of cleaning or replacing air filters can vary depending on factors such as the type of air filter, the level of usage, and the indoor air quality. However, as a general guideline, it is recommended to clean or replace air filters every 1-3 months. This helps to maintain optimal airflow and prevent dirt and debris from accumulating in the system, which can lead to decreased efficiency and potential damage.
Why is my HVAC system making strange noises?
If your HVAC system is making strange noises, it may indicate a potential issue. Some common causes of strange HVAC noises include loose belts, worn-out bearings, debris in the system, or a malfunctioning blower motor. It is important to address these issues promptly to prevent further damage to the system. It is recommended to contact an HVAC technician who can diagnose the problem and make the necessary repairs.
What can I do to improve the energy efficiency of my HVAC system?
There are several steps you can take to improve the energy efficiency of your HVAC system. First, make sure your home is properly insulated to prevent air leaks. You can also install a programmable thermostat to adjust the temperature settings based on your schedule. Regular maintenance, such as cleaning or replacing air filters, can also help improve energy efficiency. Additionally, sealing and insulating air ducts can prevent conditioned air from escaping and reduce energy waste.
Why is my HVAC system not turning on?
There are several reasons why your HVAC system may not be turning on. The most common issues include a tripped circuit breaker, a blown fuse, a malfunctioning thermostat, or a faulty motor. Check the circuit breaker and fuse box to make sure there are no issues. You should also check the thermostat settings and replace the batteries if necessary. If the problem persists, it is recommended to contact an HVAC technician to diagnose and repair the issue.

